Tricks & Tips That Will Make Decorating Easier
Decorating tricks and tips for adding ambient room lighting, hiding wires, DIY gadgets and more that will make decorating your home easier.
#1 – How to Evenly Hang Art on Your Walls
This is the best tip ever for hanging anything on your wall perfectly. I made this very handy tool with paint stirring sticks. I made two gadgets – one using a 1-gallon stirring stick for smaller art and the second using a 5 gallon stick that will be perfect for hanging large art.

How to make a picture hanging tool/gadget:
1. Duct tape 3- 1 gallon paint sticks together. If you want a large tool – use one 5 gallon paint stirring stick. They are longer and thicker – no need to tape them together. Hammer in a nail about 1-inch from the bottom so that the tip sticks out the other end.
To use the picture hanging tool/gadget:
1. Hook the picture wire or hook onto the nail head.
2. Find the exact placement on your wall where you want the art to hang and then tap the top portion of the frame into the wall. The nail tip will leave a mark on the wall.
3. You now know exactly where to place your nail to hang the art.
Simple, yet ingenious. No more guessing and putting unneeded holes in your walls anymore.
#2 Use Books to Risers on Tables to Raise Decor

When a vase, lamp or any piece of decor would look better with more height, stack a few books under it.
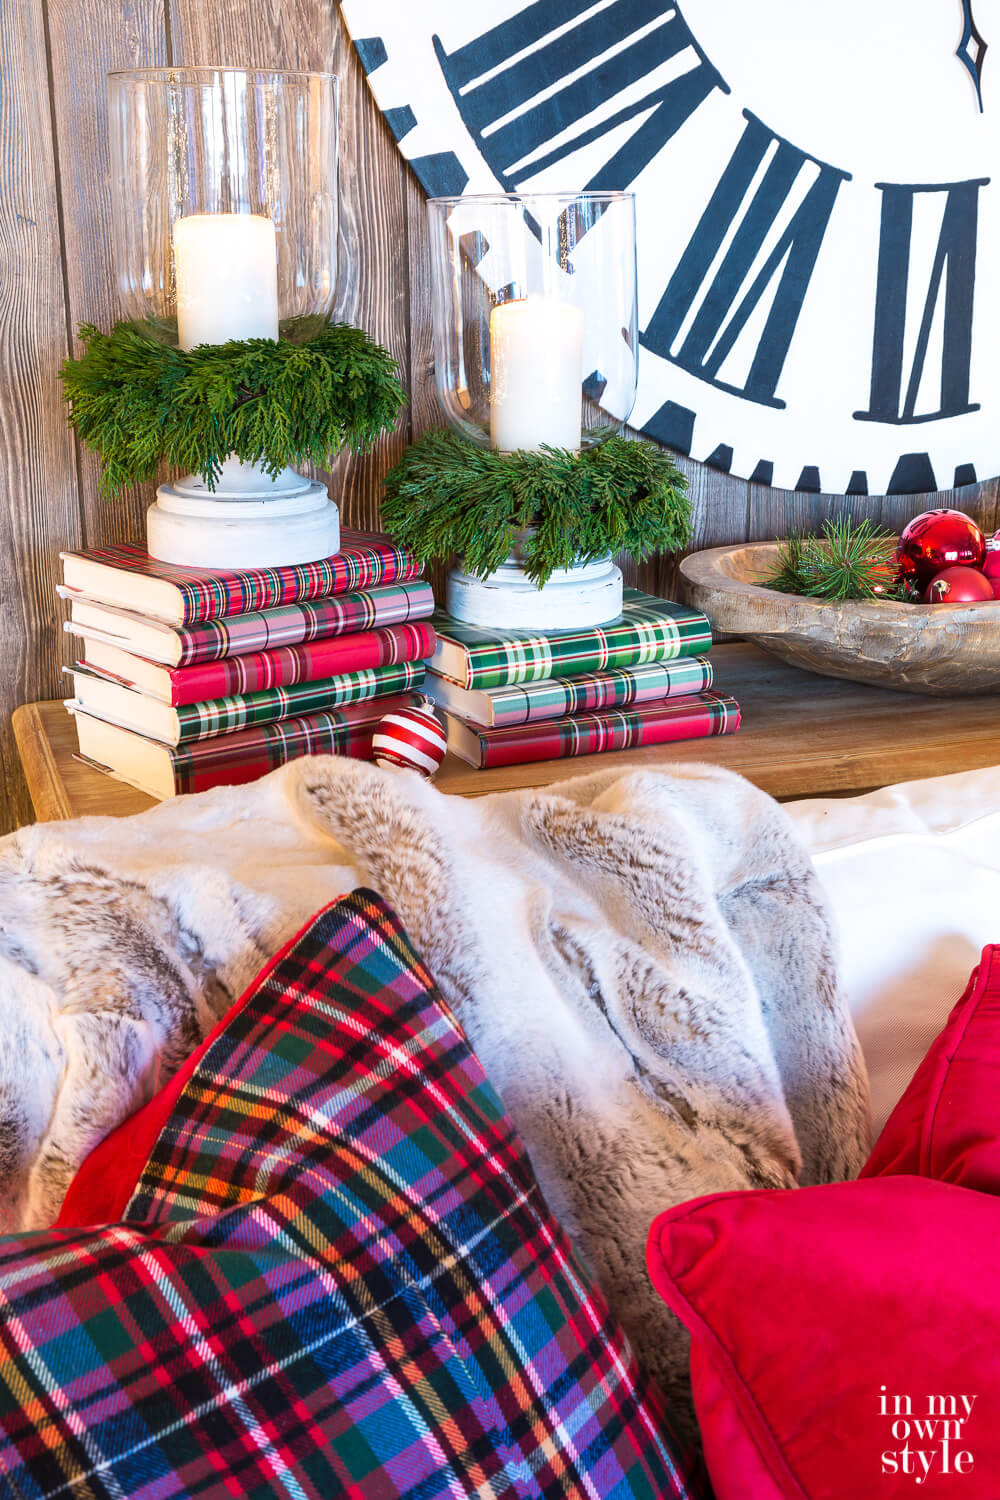
Use the books as they are or cover them with gift wrap or fabric. You can even paint them to match your decor.
#3 The Easy Way to Add Mood Lighting to any Room
When it gets dark outside the lighting in our homes is even more important. Most of us don’t give ambient lighting much thought, but I like to add mood lighting to make my home feel cozier and more inviting, especially in the winter months. I do it the easy and inexpensive way. No electrician needed!
I wish my dining room hutch came equipped with lights, but it doesn’t. I had to add my own. Here is the top of my dining room hutch. Pardon my dust :) I have two can lights and one string of white Christmas lights. They are plugged into an extension cord that runs down the back of the hutch and into a wall outlet. To turn them on and off I just have to plug the extension cord into the outlet. I don’t use these lights everyday – just for special occasions or when I want to add some ambiance to the room at night.

Here is how the top looks in the daylight when no lights are needed.

With two can lights and the string of white lights. You can buy can lights for about $12.00 at Lowes. You can see the can lights cast a circle of light on the ceiling. Lower the wattage of the bulbs and that will go away.

I know these photos are grainy, but I wanted to give you an idea 0f how the light changes when the lights are on and off.
Here the can lights are off. I only have the string of Christmas lights lit. You can achieve this same look with the can lights only – just use lower wattage bulbs.
If you don’t want to use Christmas lights, you can use:
- Tube lights or strips of lights that are made to mount inside and under cabinets. Just lay them on top of the cabinet or hutch.
- IKEA also sells some ingenious cabinet lighting you may want to check out.

In this photo the chandelier is on and the string of Christmas lights only.
The lights on the top of the hutch help balance the light in the room. When the chandelier is dimmed and I have the hutch lights and two lamps on the mantle on the opposite side of the room all lit – the room looks magical. When I entertain, I make sure I plug in all my mood lights around my house. They add quite a bit to up the ambiance.

I do the same thing in my family room. I have two corner cabinets. On top is one string of white lights along with the boxes and foam blocks I use to lift the decorative stuff I have on top. The extension cord runs down the back and into an outlet inside the cabinet. I just have to open the cabinet door to plug in the lights.

I use soft and hard foam to lift the basket I have on the top. The string of tube lights is to the back.

Here is how the room looks with no lights on top of the cabinets.

Here the lights are on. Much better. When you balance the light throughout and use both task and mood lighting in your rooms they will seem more inviting.

#4 How to Display Items on Top of a Cabinet or Hutch
You see decorative items displayed beautifully in magazines on top of wall cabinets, china cabinets and hutches, but how do they get the full object to show when there is usually a recessed area behind the crown molding that runs around the top.
The answer – shoe boxes, books and foam are free and the perfect way to make lifts so the decorative items placed on top of cabinets and hutches look like they are level with the top.
Also try making lifts using:
- Bricks
- Metal cookie tins
If I didn’t use these lifts – the pieces would be partially hidden because the top is recessed. Corrugated cardboard boxes work well with heavier stuff,

What you can’t see – can so easily be faked.

#5 How To Hide an Ugly Electrical Cord
I have been in a lot of homes helping homeowners make the most of their rooms and the one thing I see in almost every home is ugly electrical wires hanging down from the land line phone. It is usually in the kitchen.
My phone came with a dark grey wire and I have white walls. To hide it:
- You can spray paint it the color of the wall.
- Wrap white ribbon around the wire overlapping it as I wrapped. I only wrapped the section that was not going to be hidden behind my desk. It is not perfect, but so much better than seeing unsightly wires hanging down.


I place steel straight pins into nearby molding and bend each one to act as a hook to hold the wrapped wire in place against the molding. You can even spray paint the pins the color of the ribbon first. Do not put the pins through the wire.


3 pins were all I needed.

The last pin is behind the furniture. I let the rest of the wire hang down so I can plug it in.

Important: Do not place the pin through the wire – that would be dangerous.
- The pins are used as small anchors to hook, hold and keep the wire in a straight line along the molding.


I was more than happy to uncover this website. I need to to thank you for your time just for this fantastic read!!
I definitely liked every little bit of it and I
have you bookmarked to look at new stuff in your site.
Great tips. thanks for sharing!
~Tami
Now we all rush out of our houses to go buy Christmas lights and dig shoe boxes out of the trash.
Your decorating is lovely thank you for showing us the great tips!!
So many great tips. Thanks for sharing! Loved the ribbon idea around the cord. I can think of several spots that could use that in my house!
Dana @ craftedniche.wordpress.com
I LOVE trick number 3! Definitely something I need to do around here.
Oh my goodness those lights add such an incredible effect…and look how simple it was. Thank you for these amazing tips!
I would love for you to link up my my very first Fresh Friday Link Party!
http://www.releasemecreations.com/2011/10/fresh-fridays-link-party.html
Hi Diane, I had a chance this morning to enjoy your blog with a cup of coffee. It was so inspiring! I went way back to some of your first posts, crafts, etc. Love, love, love your blog.
Great tips thanks!
Those are great tips. I never thought of adding light that way or covering an ugly electrical cord. Thanks.
Great ideas Diane – I especially love the lighting and the hanging art work ideas. We struggle with lighting in our home, so this might be the touch we need for that extra added touch of ambiance.
Great ideas!
You are just brilliant in such a useful way. I SO wish you lived next door. Really.
HI, I have random lights around the house on timers so that they go off and on without me running around the house. Love these in the winter when we come home from work and the lights are already on.
Thanks for your great ideas! Keeps me motivated!
Michele
The wire cord – I do the same thing but with paint. It’s amazing how that cord will virtually disappear! And the art hanging gadget – That is going directly into my toolbox….Thanks AGAIN
~Renee
Wow you have some really great tips here. Love the tips for backlighting and the boxes on the hutch. Genius! I am stumbling this post. I am a new follower from Someday Crafts hop. Vicky from http://www.messforless.net
I LOVE all these tips!!!! GENIUS, I say, just genius!!! My fav tip, if I had to pick one, would be the hanging tool – this is just unbelievably fantastic; I will absolutely be making this gadget!
Thanks so much for all the tips!
Take care,
Christina
designingbynumbers.blogspot.com
Hi Christina-
Once you make the hanging tool, you will never stress about hanging something on your wall again. The tool does the hard part for you.
I love your mood lighting tip. I love extra lighting in my rooms, especially during the winter months. I will definately be using some of these ideas. Thank you so much for sharing.
I love the tip for hanging art. I always end up with 10 holes for one picture! LOL
Neat tips. But as wife of a fire inspector, I can tell you wrapping a cord with ribbon is a big no-no, a definite fire hazard. Cords get hot sometimes. Just buy a white one, they’re inexpensive! Not trying to be bossy, just keep it safe! I enjoy your blog!
Thanks for the heads up Arlene.
I wish manufacturers kept the cord colors the same as the item color. The phone is white so should the cord. :) I still will use the straight pins to neatly hold the cords into place though. The pins do not go through the cord – the cord is placed behind them after I bend the pins.
Great tips, Diane! I was going to do the first one {for the tops of cabinets}, since I just had to deal with that myself this week. Maybe another cup of coffee will get my brain pumping with some other tips and tricks! Love the idea of having something to use to help hang pictures. Looking forward to the linky!
Loving this! Looking forward to the rest of the links. I’m definitely in for this one!
Love how those light look in your place. I’m always using Christmas lights, year ’round, to light various spots in my house. I really appreciate your cord hiding tips too!
Thanks.
Seriously! My life will never be the same after learning how to easily hang art!
I am all over that! I usually just eyeball it.
Fabulous tip!
Thanks
xo
Isn’t it great? When I saw it on the blog Scrap Shoppe I had to try it. It works perfectly!