The No-Drill Trick for Hanging Art on a Kitchen Tile Backsplash
There’s something about the space between your countertop and upper cabinets that often gets overlooked. It’s practical, yes… but it can also be the perfect little canvas to show off your personal style.
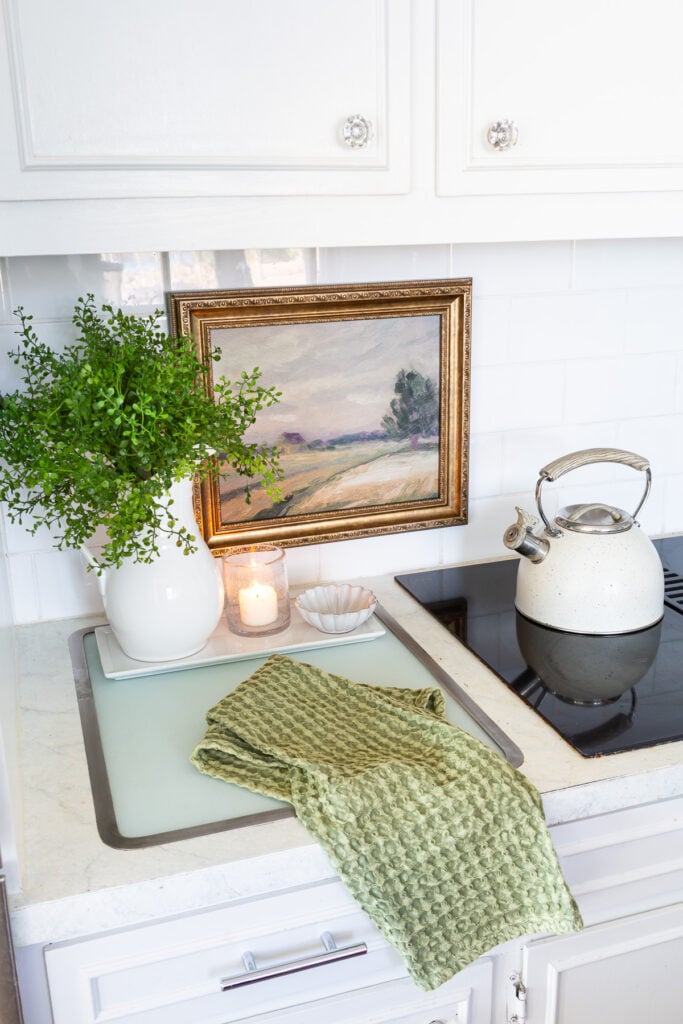
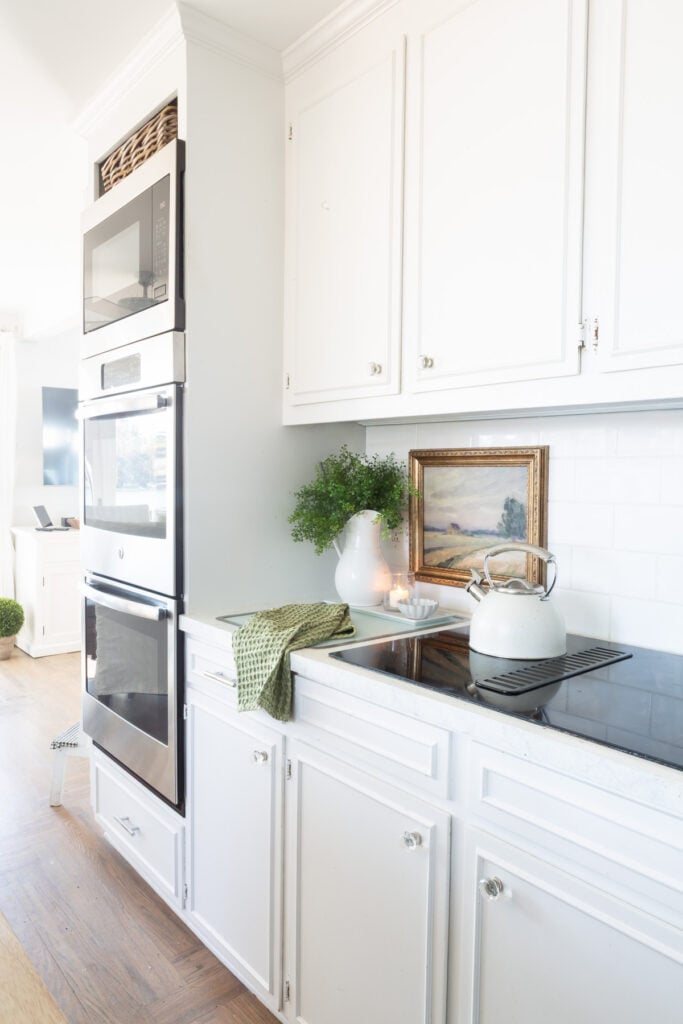
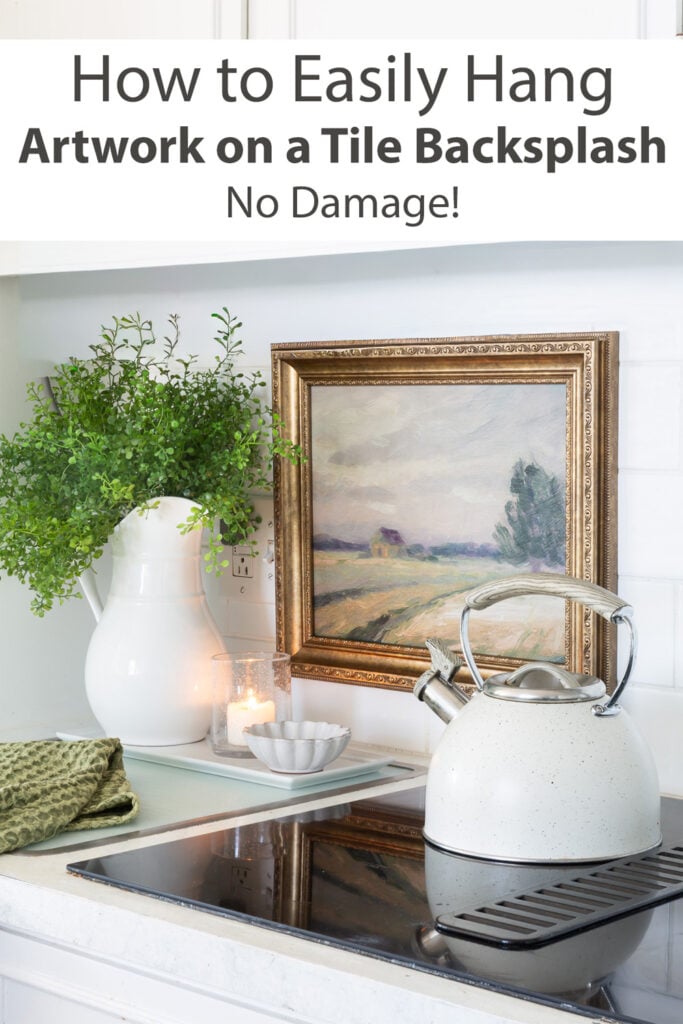
If you’ve ever wanted to hang framed art on a tile backsplash but stopped yourself because you didn’t want to drill into tile or risk cracking it, you’re going to love this simple solution. Adding art to a backsplash is one of those small decorating moves that can completely change the feel of a kitchen, and the best part is, it can be done without a single nail or speck of damage.

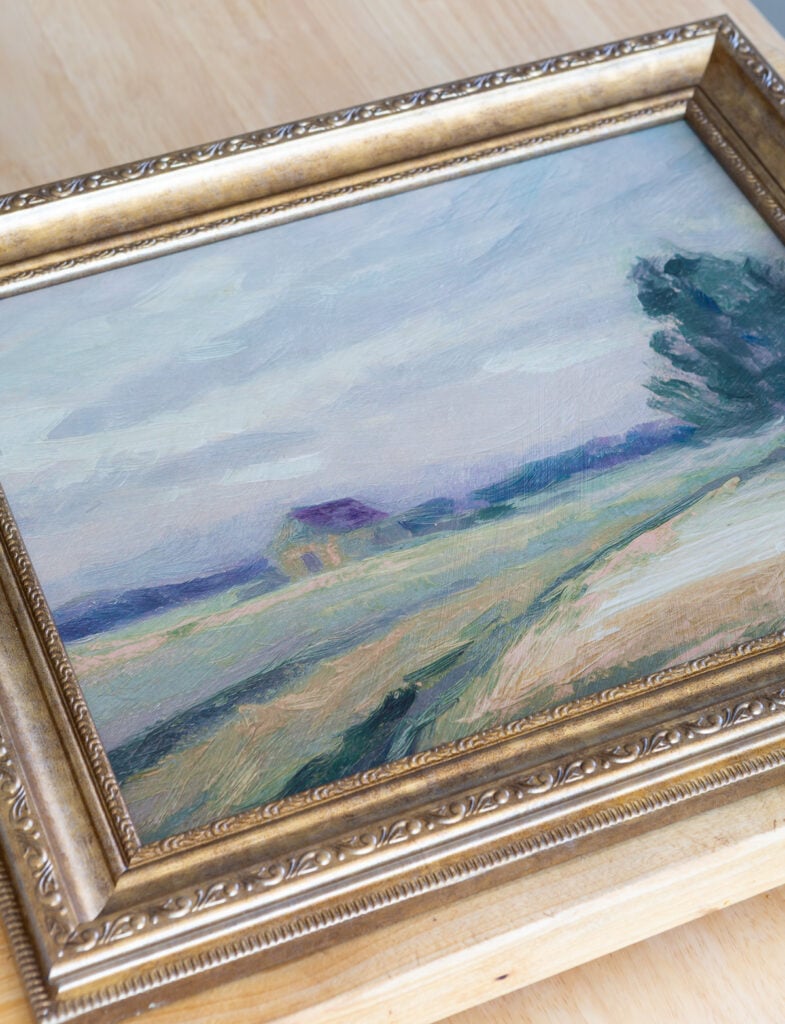
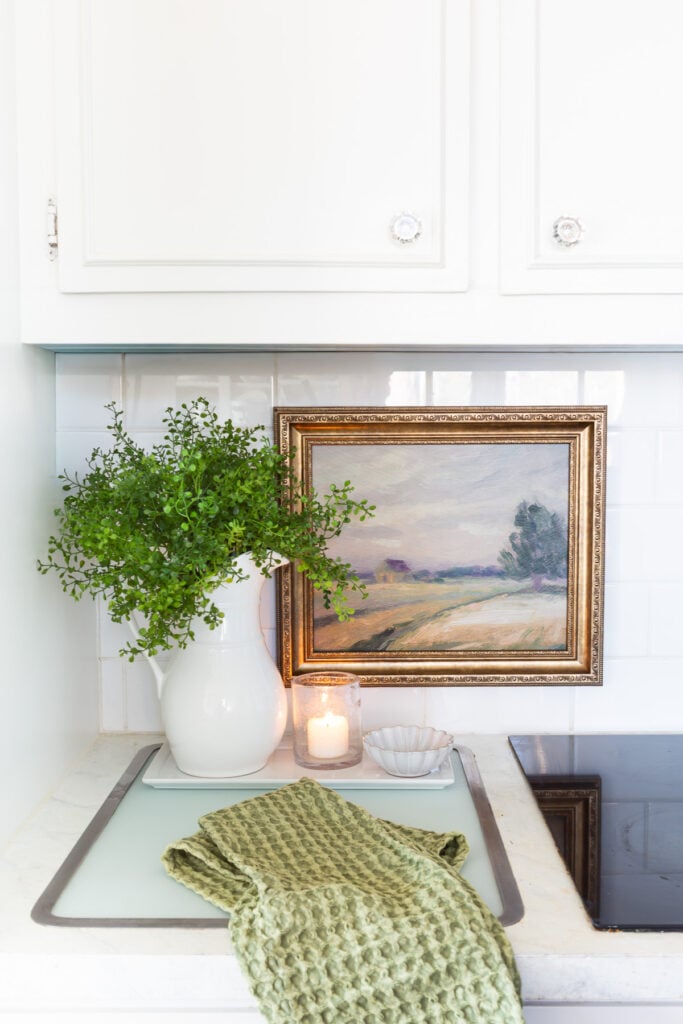
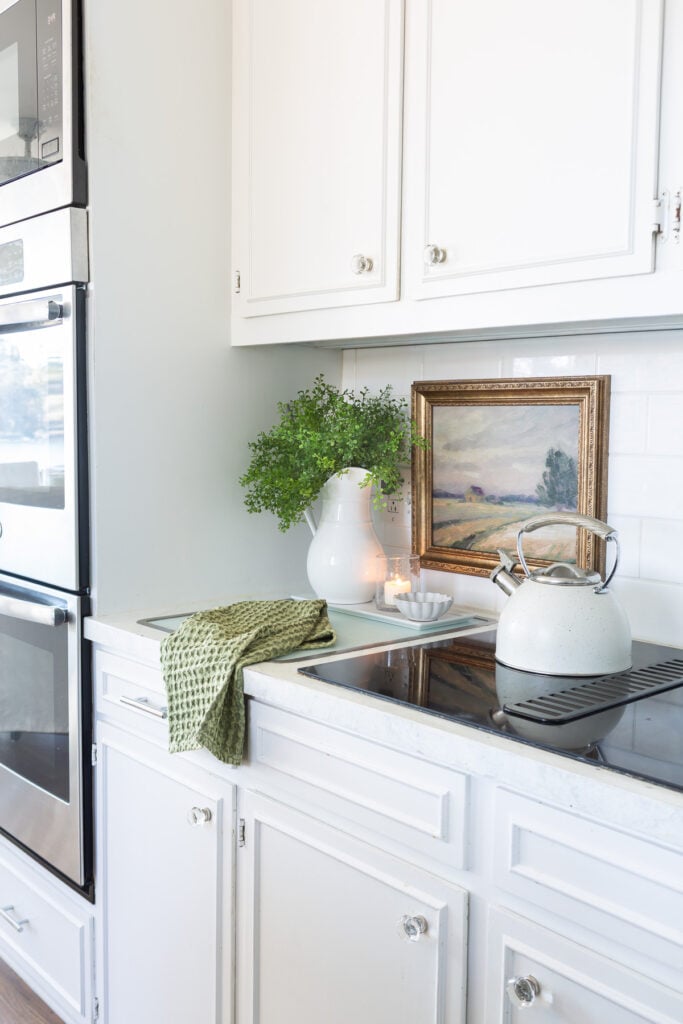
I finally found a piece of framed art at Hobby Lobby to replace the “eat good food” art in the above photo that has been hanging in this spot in my kitchen for 5 years.
I view this spot all day long since it is in my kitchen and have been wanting to add new energy to the space in some way.
You know that moment when you’re just browsing or simply out and about, not really looking for anything, and then something just stops you in your tracks? That was this artwork.
I came upon this art find for the bargain price of $16.
The framed art showed up in the shopping cart of a young mom who was ahead of me in the Hobby Lobby check out line. Her two kids were in the cart and getting antsy as the line was long.
To protect the contents of the cart, she pulled the framed art out and as she did I got a perfect view of it.
Instantly I said to myself, “that is exactly what I have been searching for in size and the soft color palette that blends with the view out my windows and doors.” I immediately asked her what aisle she found it in and I beelined to get one for myself, knowing exactly where I was going to hang it.
Why This Piece of Art Was the Perfect Fit
Before hanging the art to replace the “eat good food” art, I leaned it against the opposite wall in the kitchen near my countertop lamp. I just wanted to see what it would look like.
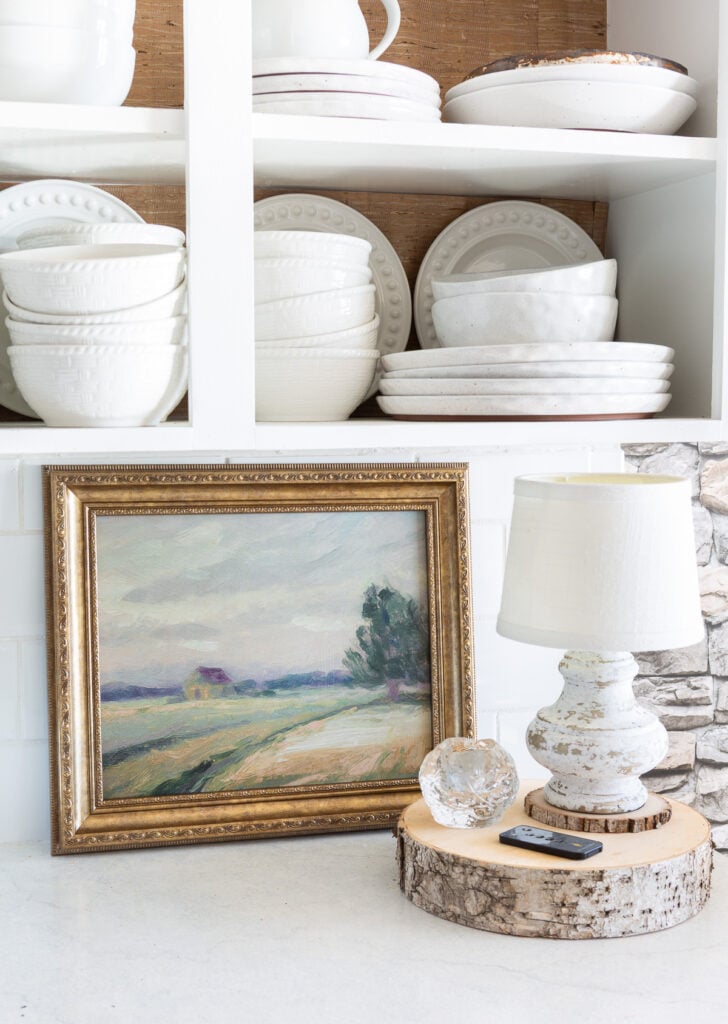
I liked it here, but to keep it here I would have had to move a blender and paper towel holder that I use everyday. Not functional, so back to where I had planned to hang it.
The colors of the painting are the first thing that drew me in, soft but still vibrant enough with touches of purple that make a statement. It has a calm, cozy vibe that I knew would be perfect for the tile backsplash area.
The frame itself is classic, which I love, because it lets the art be the star while still looking polished and intentional on the backsplash.
Landscapes like this are classic and have been popular in home decor for the past few years. Before finding this one, I have considered many, but they were too dark, monotone or depressing to my eye. When looking for wall art for above my fireplace last year, I gave up trying to find something I liked and painted my own canvas.
My new framed art find now makes my tea making corner feel updated, but not cluttered. Since my kitchen and living room are open to each other, this new piece of art also keeps the color flow of the rooms coordinated.
How I Hung It with 3M Command Strip
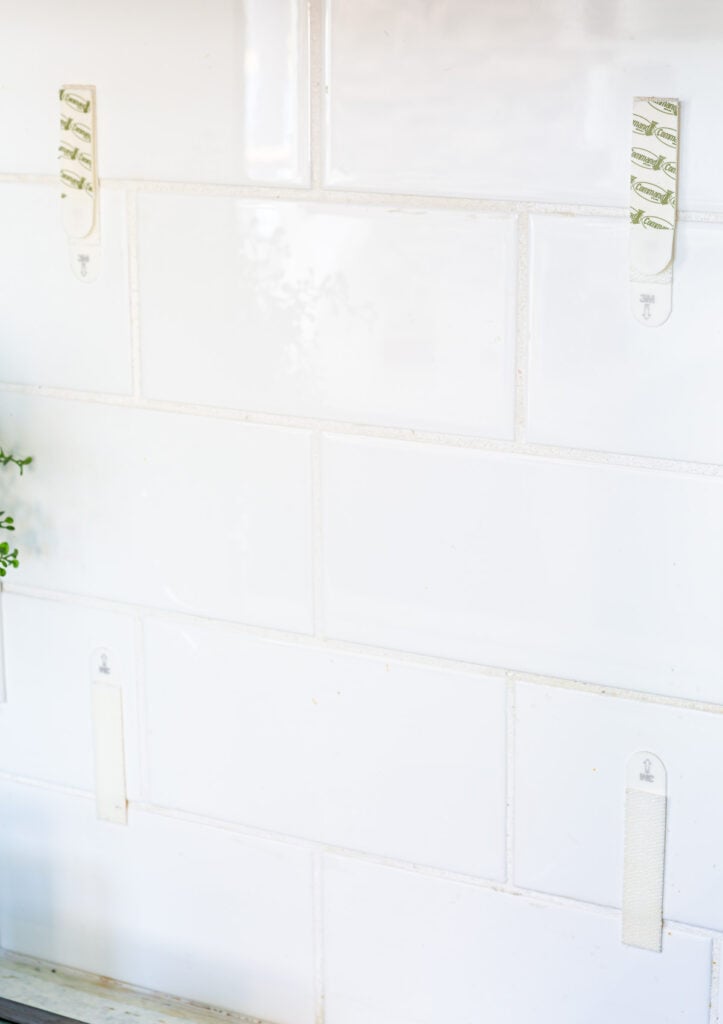
Since you can’t hammer a nail into tile, instead of pulling out nails and a hammer, I pulled out my stash of Command Brand Picture Hanging Strips. (This is NOT a sponsored post.) I even used the same base part of these strips that have held the Eat Good Food art I had up for 5 years. So don’t let anyone tell you these strips don’t work. If you follow the directions they will hold up for a very long time.
I love these strips and use them for hanging so many things because they’re:
- Damage-free – no nail holes or chipped paint
- Adjustable – you can reposition if you’re a perfectionist like me
- Removable – perfect if you like to change out decor seasonally
Important Note: When buying Command Brand strips make sure they are a new pack. If they have been hanging in the store for a long time they may be an old batch that didn’t stick. You can tell the ones that were defective if you can’t peel the backing easily off to expose the sticky part of the strip. The pads should be very sticky. If they are not return them and buy at another store.
This has happened to not only me, but others. Another tip, reader Deb suggested is only to buy a package for the amount you need. Don’t buy in bulk unless you are going to use them all right away. To make the strips a truly great product I think 3M needs to add expiration dates to the packaging or recall the bad batch.
Here’s a quick overview of what I did:
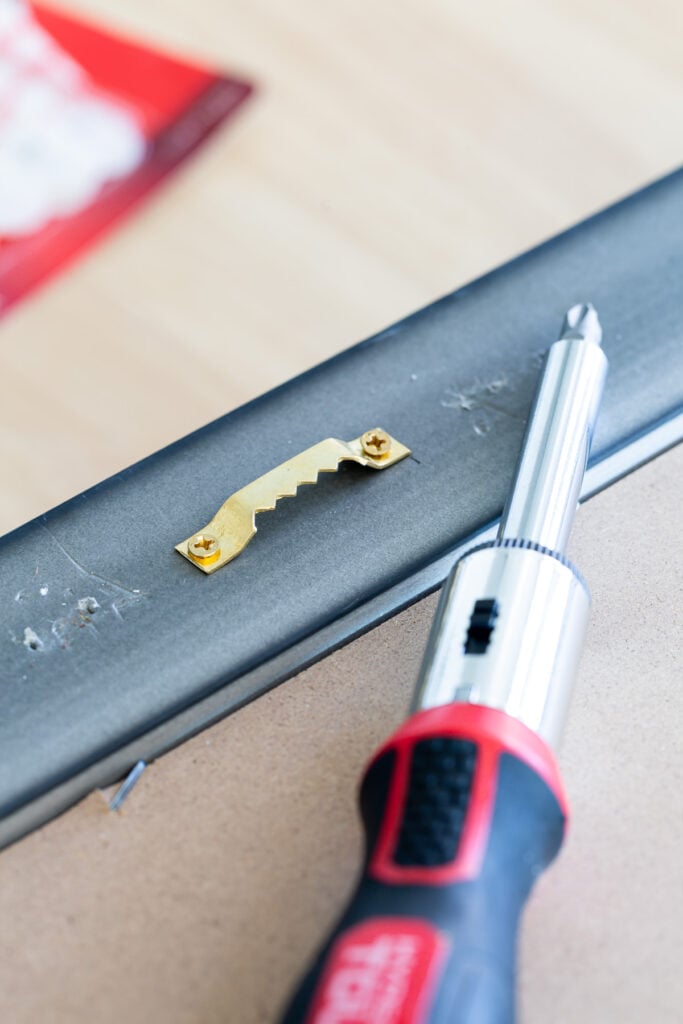
- Since I was using the picture hanging strips, I removed the picture hanger that came on the back of the frame.
2. I held the frame up to the wall to find the right height and made a light pencil mark as a guide for where I wanted to place the frame.
3. To help the strips adhere better and last a long time, I cleaned the back of the frame where I attached the strips and the tile with Isopropyl Alcohol and let it dry.
4. To attach the strips to the frame – I pressed the Command Strips together in pairs so they “click” like Velcro.
Then I stuck each pair to the back of the frame, one near each top corner and, on the bottom for extra support.
5. Positioned the frame on the wall – I pressed the frame firmly against the wall, holding it in place for the amount of time recommended on the package so the adhesive could really grab.
6. Let it set – On the package directions, it states to remove the frame from the strip on the wall to let the wall-side strips set, and then rehang it. I usually just give whatever I am hanging a good press until I hear the click for each strip and make sure the frame is secure and let it be.
And that was it. No tools, no holes, and no stress. The frame feels solid on the wall, and I love knowing that if I ever decide to rearrange or swap pieces in the future, I can take it down without leaving any damage behind.
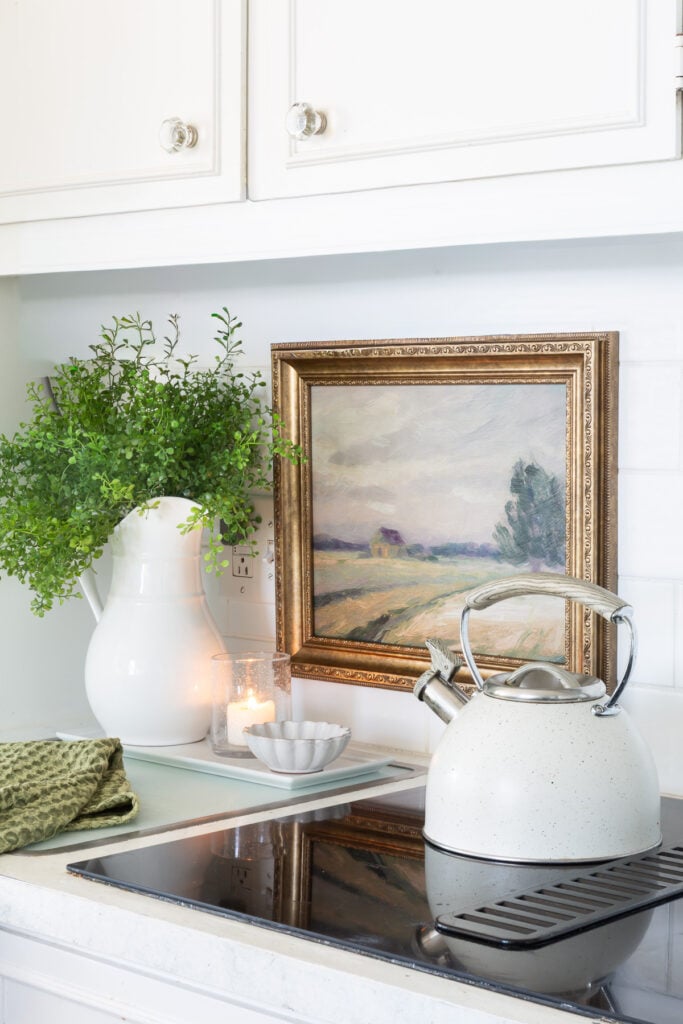
This little project reminded me how satisfying it is to add something new to my home. For me with a piece of art you truly love, and how much easier it can be with the right tools. My new Hobby Lobby find looks like it’s always belonged right where I hung it, and the 3M Command Strips made hanging it simple.
If you’ve been putting off hanging art because you don’t want to deal with nails or commitment, Command Strips are definitely worth trying.
Products I Used
- Command Brand Damage-Free Picture Hanging Strips
- White Pitcher and Teapot – HomeGoods
- Faux Greenery Stems – Hobby Lobby – (similar)
- Green Waffle Tea Towel
Home Decorating Ideas You May Also Like
I love this idea – beautiful art belongs in the kitchen, too! Once again you have inspired me to look at a space in my home with fresh eyes. I think I will also travel over to Hob Lob today!
Diane, what size is your piece of art? I’d like to try and find it on the HL website, but I’m not seeing anything similar. Did you purchase it recently?
Hi Mary – I am not home right now to measure the frame, but it is about 16″ x 14″. I looked on HL site and could not find it. I just got it on Friday. It is part of their new Spring line that is just coming into the stores. If you have a HL near you, you will most likely see it.
That looks so pretty! What do you do with your appliances to make room for the decorating? My counters and space between the counters and tall cabinets are taken up with appliances (they are tall).
Hi Dianne – The appliances I keep on the counters in my kitchen are on the sink side, not the cooktop side where there is only one outlet. I have a coffee maker, blender and food processor. Since my kitchen is small I moved my toaster, airfryer and Instant Pot in what was my office and now is a multi-purpose room and pantry. You can see them in one of the photos in this post: https://inmyownstyle.com/how-to-create-a-multi-purpose-room-in-a-home.html.
I love command strips and have numerous art hung using them. However, I have read where people were disappointed in them and said they didn’t work for them.
I had never had a problem until last year and did some research and found that there is an expiration on these strips
if not used. The ones that failed me were probably left over from two years or more.
So now I know to be sure and use ones recently purchased or not more than a couple years old. I no longer buy them in bulk but only a couple packages to have on hand.
I have numerous pictures that were hung 7 years ago when I moved into this home and none have ever failed.
Hi Deb – Thank you for bringing this up about the old strips. To make them a truly great product I think 3M needs to add expiration dates to the packaging. A few years ago I bought a pack at Target and they were all dried out. Since I knew how they were supposed to look and how sticky they are, I could tell they were dry and wouldn’t work. I took them back, but for anyone who has never used them, I can understand why they would think they were not a good product. Great tip on only buying the amount you need and not a bulk pack. I will add this info to the post. :-)