The AFTER of the Cabinet Makeover

How patience and a sunny day made what I thought was a total furniture makeover fail, come out OK. Read on to see how the painted cabinet base that I stripped recently came out and looks now in its new home in a guest room in my home.

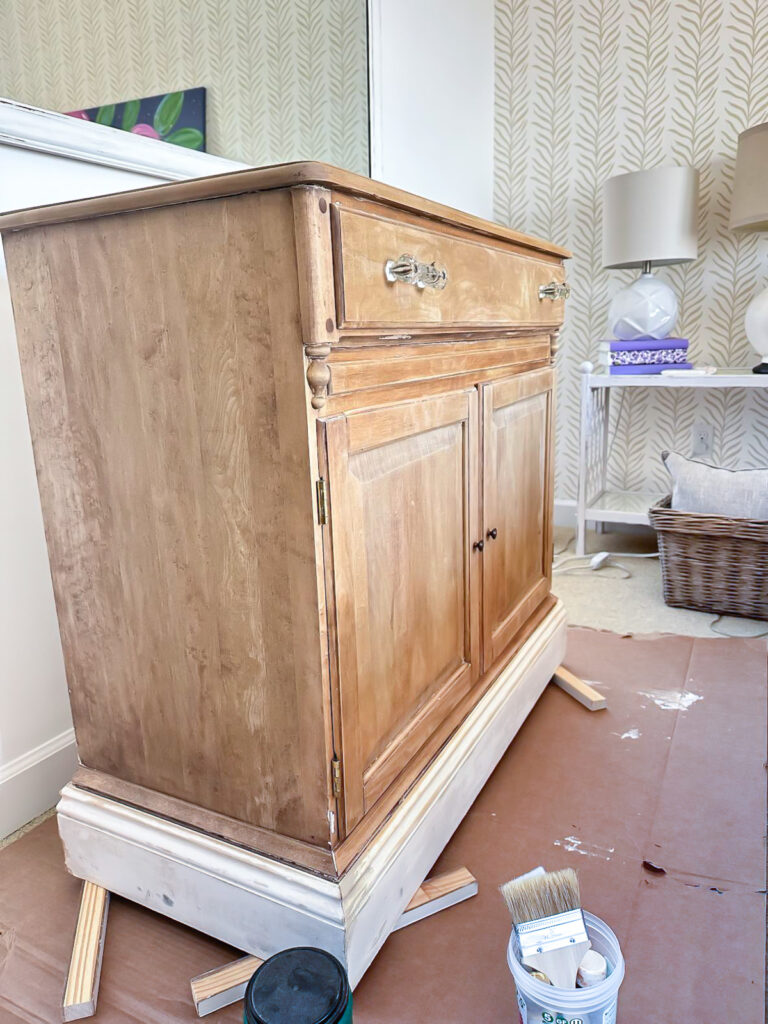
Here is the photo of the stripped cabinet a few days after I finished stripping it with CitraStrip. It was spotty and grey.
I was not happy with the results of the paint stripping, plus if you read the post, I had forgotten that I added white MDF baseboard trim around the cabinet when I made it and an identical cabinet into a work table for my studioffice/craft room. It can’t be stained to resemble wood.
I knew I could faux paint the base to resemble the natural wood look I was after, but the finish on the cabinet itself was just not pleasing.
What I Did To Make The Paint Stripped Cabinet Look Better
After a few days of thinking about what I could do, I thought about placing the cabinet out in the sunshine.
A reader also suggested this and there was nothing to lose, so I went for it.

Early one morning last week I moved the cabinet out of the room and onto the upper deck of the house and left it to sit in the bright warm sun all day long.

Late in the afternoon I couldn’t believe how much better the wood looked all over, especially the top and the left side. The grey and dark spots had vanished! The sun dried the wood out completely and lightened the dark spots.
It still looked a little spotty and grey when I brought it back inside, so I rubbed a sanding block with 220 grit sandpaper over the surface to see if that would even out the darker areas. It did help some.
The next day I started to paint the base using a faux wood graining paint technique that I had used to make the front door and garage door of my house look like a grained wood finish.

First I mixed a few colors of acrylic craft paint that I had together to create a warm yellow hue base.

I used a wide chip brush to apply the paint in one long horizontal stroke over the white baseboard to create the start of a grain. I let this paint layer dry completely.

When the yellow coat was dry, I mixed brown paint with clear mixing glaze. This is inexpensive and can be bought at Lowes or any paint store.
If you are not familiar with what a paint glaze does and how it allows you to create faux paint finishes, read this post: All About Faux Painting With Paint Glazes

I used the same wide chip brush and applied the brown paint/glaze layer all over the baseboard in one long horizontal stroke across each side. Then I used a clean chip brush and went over the layer to expose some of the yellow base color. I let this dry.

Once that coat was dry I dipped the brush once again into the brown paint/glaze mixture and wiped some of it off on a paper towel. Then ran it again horizontally along the baseboard to create a bit more grain and color that would become a close match to the cabinet.
Wood Cabinet AFTER

Here is how the finished cabinet looks in the room. I added vintage glass drawer pulls and found the original door knobs in my stash of drawer and cabinet door hardware.
The bed in the room blocks the light and creates a shadow on the bottom of the cabinet so the lower half looks darker in this photo.
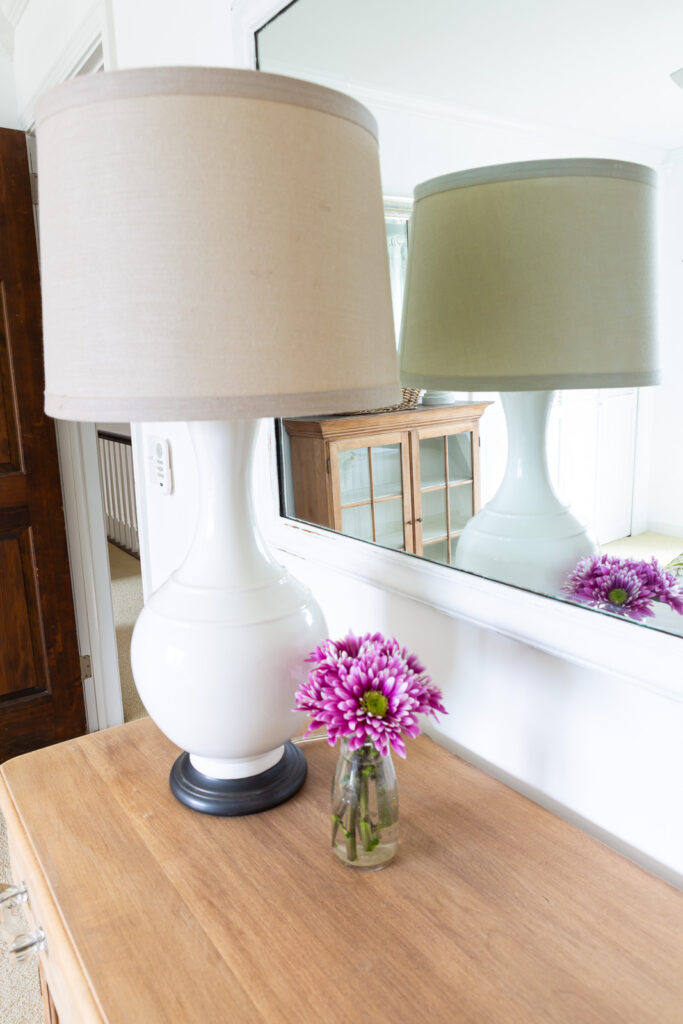
The sun was the key to getting the finish color and overall look of the wood I wanted to achieve. This of course made me very happy since it is what guests who stay in the room will see and be placing their stuff on.
The main reason I wanted to strip the paint off of this cabinet was so it would match its top. Yes it has a top piece that I use separately in the room as a glass fronted sideboard. You can see it in the mirror’s reflection.
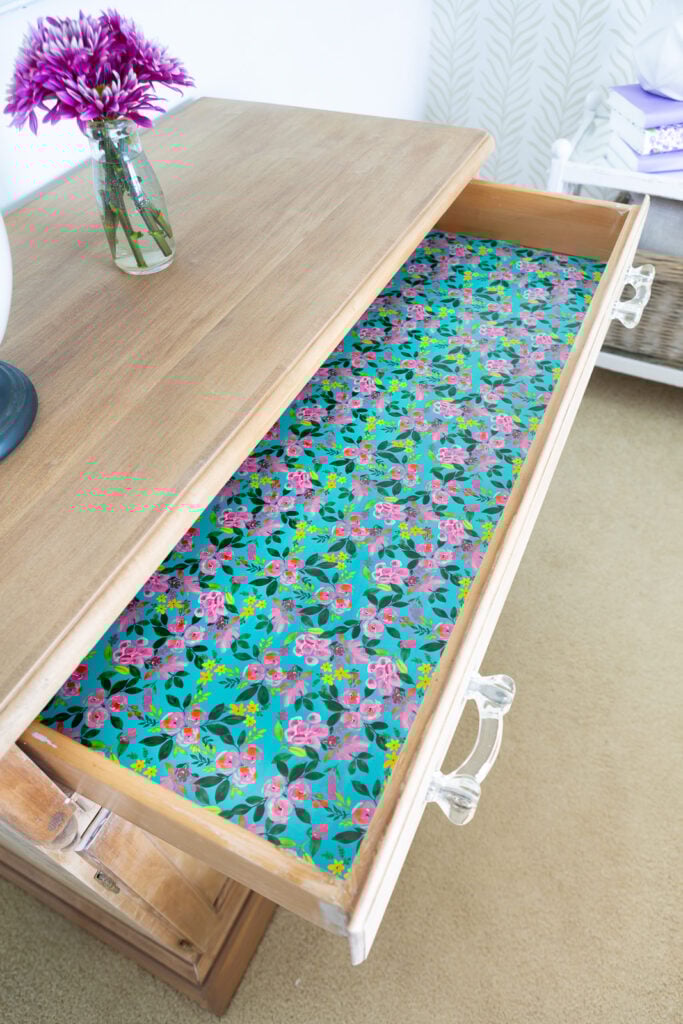
To add a pop of color to the cabinet, I lined the drawer with floral gift wrap as a surprise for guests when they open the drawer to place their belongings in. To learn how I do this, see this post: The Easy Way to Line a Drawer

The finish may not be exactly what I was looking for, but came out so much better when I took the time to work through some DIY fixes after the inital paint stripping provided unsatisfactory results.

Maybe someday I will pair this glass front door top in the room that I added bun feet to with the base again. For now the base cabinet will be a place for a lamp and guests to place their stuff.
Other DIY Decor Projects I Did For This Room

Diane, I like the wood choice vs painted for guest room. Think it adds an element of warmth to the room. Genius idea to split the piece to add storage for your guests and space for more lamps to add lighting. You always have such good ideas!
I think it looks great. The white-washed wood effect is pleasing with the white bed linens and the rug – as well as the other cabinet in the room. Two thumbs up.
I admire your hard work and perseverance BUT I’m not excited about the final product. I think it would look better painted. You do such amazing paint jobs.
Diane, your persistence really paid off! Would you have a source for the drawer liner paper?
Hi Ann – I got the paper to line the drawer at HomeGoods. It is a Martha Stewart gift wrap.
In a word, WOW!
Looks beautiful, it came out great!
Your ingenuity never ceases to amaze me! The result is just perfect, especially the wood graining you layered onto the cabinet base!
Fantastic!!
Wow, Diane! If there’s a will, there’s a way! Who knew that placing this piece in the sunshine would inspire you to keep going with the painting technique on the bottom? I like how it turned out.
Pure genius Diane – love it!
You are amazing!!! Way to go on salvaging the dresser. It’s beautiful.
The cabinet looks great and I admire your persistence!
Hi- I LOVE this! And I have that exact lamp and broke one of mine and have been searching for the replacement- do you remember where it’s from?