Craft Room Tour: My Studio Office


Welcome to my craft room aka my studioffice! This is the place where I come to be creative and unleash my imagination and experiment with ideas in my head. I have my furniture set out in an organized way that makes it easy to access what I need in order to make whatever I am envisioning.
 In My Own Style Blog Craft Room Tour
 In My Own Style Blog Craft Room Tour
If you have been reading my blog for a while… get ready to see the changes I made to my craft room that I call my studioffice since one half serves as an office and the other half as a creative studio.

My craft room aka…my studioffice is right off the kitchen through a pocket door. Over the last few months I have kept it closed since the room was a mess with all the supplies I needed to makeover the kitchen. Now that the kitchen makeover is complete, it was time to get the room back in order.
Craft Room Tour Questions
Since this post is a tour of my craft room and creating space, look for the link under each photo that will take you to the post/project DIY about it.
If you have any questions about anything you see, just leave them for me in the comments.
Let’s Start With My Craft Room Office Desk

The first thing you see as you enter the room is my desk that is placed in the center of the room. It is where I do most of the business parts of blogging. I found this desk in curbside trash. Here is how I made it over: Found Desk Gets a High Gloss Makeover
The pink peonies on my desk are fake. I bought them at Craft and Barrel

I have two wheeled cubes on either side of my desk. One is where I store paper and the other side holds my active project files. I bought the White Grant Office Chair at World Market. The lamp is from HomeGoods. The rug is from FLOR.

I placed the desk in the center of the room so that I could face the glass doors and see the lake as I work.

On most days I am pretty good at focusing on work, but there have been a few days that the lake has called me away. :-)
Desk Side Tray Basket File
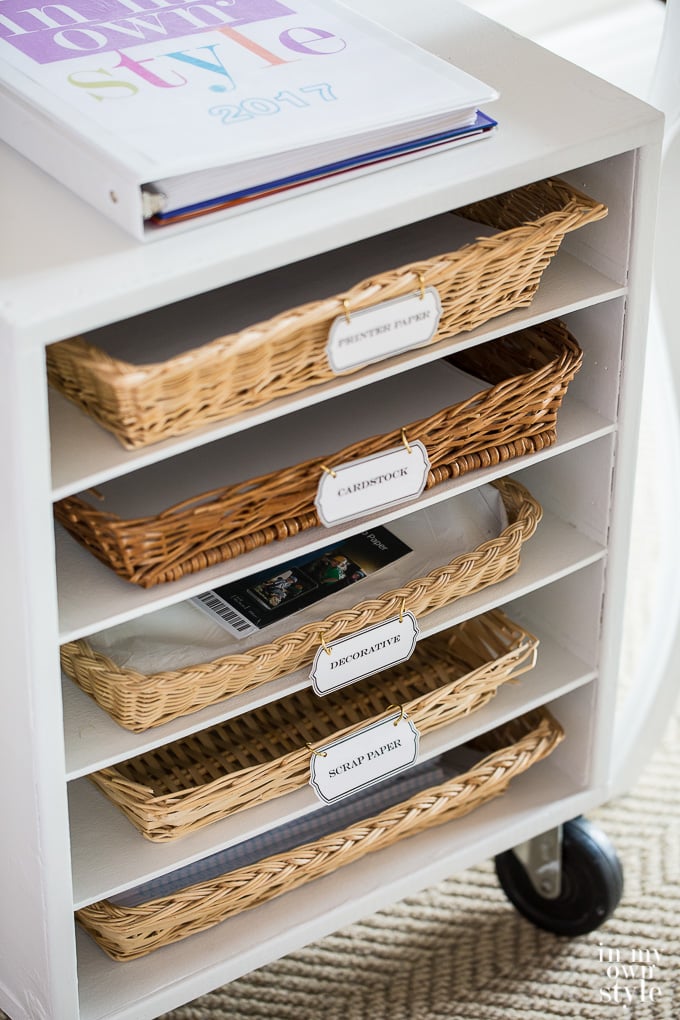
I found this cube with the shelves in a neighbor’s curbside trash. I cleaned it up, painted it and added the wheels to make one very pretty way to organize paper.
- I store printer paper in thrift store baskets in this wheeled shelf cube.
- On the top is where I keep my daily planner.

Last week I decluttered my desk and made pretty drawer dividers to keep my stuff organized. How to Make Desk Drawer Dividers The Easy Way
The Long Work Table Area with File Drawers

On the left wall is my new work area that I created with file cabinets the previous owner of the house left and a new file drawer in the center. I wanted to create a large working surface for sewing and other projects that don’t need paint and tools.

To make the long work table I needed a center file cabinet. After searching online, I found this one. It is from Anna Griffin.
To see how I built the work table: Long Work Table with File Cabinets

I covered my chair using the same method I shared in this post: How to Makeover an Office Chair

I made the memo/pin board using fabric and foam insulation. In my previous house I used to keep a wall calendar on it, but when I moved last year I made it into a place to hang some of my favorite things. You can read how to make it: How to Make a DIY Memo Board or Wall Calendar
The pink stool was a family hand-me down that I painted with DIY chalk paint. Plain to Preppy Stool

The Paris and New York signs were from the mudroom in my previous house. I shared the tutorial in this post: Grand Central Station-Mudroom Organizing
My Sewing Studio

On the far end of the work table is my sewing center. I keep my most needed sewing supplies at hand in the file drawers. My sewing machine is on top of the worktable. I made a fabric cover for it and when needed, I can easily remove the cover and start sewing.
How to Store Camera Lenses

In the file cabinet on the opposite end of the worktable I store all my camera lenses.
- To keep them safe, I cut foam to fit inside the drawer and made a section for each lens. I hot glued the pieces of foam together.
The Creating Wall Side of My Craft Room
On the opposite side of the room is what I call my “Creating Wall”. I wrote about it here: Craft room wall organizer. I moved it from my previous house and re-created it. It is where I paint and make things that are messy and require tools.

I made the work table by putting together hand-me down sideboards and a hollow-core door.

I made the frames to hold tools, gift wrap, and ribbon.

The ribbon holder is a new addition. Learn how to make a Ribbon Holder using roof flashing.

Almost everything I make and post about passes by this table at some point in its creation.
Here is how I made the gift wrap organizer on the wall: DIY Gift Wrap Organizer
Craft Room Furniture Used for Supply Storage

I bought this metal file drawer cabinet when I went to Nest Fest last fall. I added the feet and painted it with white chalk paint.

The drawers looks small, but they hold quite a lot.

I store all my craft paints and misc. supplies in the drawers.

I created the labels on my computer and used many of the free fonts I have downloaded over the years.

Lots of organized storage makes me smile.
On the back wall is where my crafts closet is.

I painted it pink.


I store many crafty supplies inside it.

More Craft Room Ideas You May Like
- How to Make a Craft Room Work Table
- The Many Lives of My Craft Cabinet
- For Bloggers: How to Make a $20 Photo Studio
Diane, I’m a member of the Decorating Panel and saw your post sharing your bedroom makeover which led me to your website and ultimately to your office/craft room makeover. The organization, storage and color in the office/craft room is to be envied! I’m curious as to the room size? You managed to beautifully incorporate all workstations.
I need you to come do a makeover for my whole house!! This is so beautiful!!
Hi Diane. Thanks so much for sharing your creative space. What a wonderful place to work. I love your clever ideas
for making a beautiful office and craft room. I’ve included your post in our latest Top 10 in Craft inspiration roundup.
Cheers Jodie :)
Awesome idea! I need more inspiration to clean up! LOL
So pretty and organized! Have your hands stayed formed to a paint brush shape yet? :)
Hi Laura – :-) On some days I believe my hand shape has changed. Since I have been painting a lot, my right hand does tend to get painful, especially when it is going to rain. :-)
Diane, I’ve been following your wonderful blog and creative ideas since well before you and Ed moved to your dream lake house (my dream too). My craft room resides in a finished room in our basement. It does, however, because our home is built into a hill have a large picture window and a regular-sized side window so there is a lot of natural light. I’d even grown garden seedlings in that room for many years. Not now since we travel a bit more, but I do over winter my hanging baskets and some potted warm-weather perennials and it works very well for me.
Still, my craft room now looks like an episode of “Hoarders.” I’ve been looking at photos of craft rooms for quite a while,, but yours is truly the prettiest, workable solutions I’ve found. It’s beautiful, so very well organized for all the types of crafts I enjoy (including sewing space), yet doable (is that even a word?). I’m inspired, even though I don’t have a view of a lake like you do, but I do have a nice view of flower beds, trees and woods. We do enjoy a beautiful lake just a five-minute walk away…still not the same thing. Once again, Diane, you’ve inspired me.
Hi Patricia – I remember you telling me how pretty your view is out to your flower garden and woods. It sounds beautiful and must inspire you when you are in the room. I bet you are looking forward to spring and planting new flowers to enjoy all summer long.
I’m pretty sure your Ed is a jewel! What a great encouragement.
Talk about talent – and you must have your own coffee supply somewhere near… I can’t see how you manage to get that much energy! It’s a great space, looks just like you!
It looks fantastic. It must be a joy to work in such w great space. You are a very special lady .
Thanks Betty XO
Diane! This is so perfect!! The whole room – the file cabinet – the PINK!! I’m at a loss for words. I can’t imagine a funner, more inspiring, and stimulating area to work in, and it amazes me that you created it all yourself. Pinning this!
But, surely… you have to let us know what pink you used? ;) It’s so delicate.
Hi Zovesta – Thank you so much. I am enjoying working in my cleaned up and reorganized space. Even my husband noticed that I am really enjoying it. The pink paint color is called Pure Pink 03D-2 from Clark and Kensington. It is sold at Ace Hardware. I mixed it- 3 parts Pure Pink to 1 part white to get the soft pink color.
Thanks! I’m always afraid to mix white into colors because I’m afraid it’ll make them so light you’ll mistake them for off-white. Your pink definitely stands out. :)
Beautiful Diane! You are the queen of clever and PRETTY storage and organization ideas. That view! I totally would be in trouble some days. ;) Enjoy you amazing space!
Hi Diane – Thanks. I adore the view and it does get me in trouble somedays :-) Living on the water is what I have always dreamed of. Being able to work and view it is the icing on the cake for me. Ed told me this morning that he can see how much I am enjoying my decluttered and organized space.
Oh my! This is an amazing space, everything so organizedl. The deck and the view is just beautiful!
Diane – The room is beautiful! It belongs in a magazine. I love looking out a window while I work and the view from your window is amazing!
I love how bright your whole space it. That metal drawer cabinet is amazing! Thank you for sharing as part of the blog hop.
Thanks Tauni and thanks for inviting me to be part of the tour.
I love this sooo much! Gorgeous and inspiring!!
Hi Barb – Thanks. It would be a good place to have our craft get togethers. Remember them? Seem like such a long ago. Time really does fly.
That view is breathtaking, I’m not sure I would get anything done if I had that lake taunting me. I love all of your ideas for storing your craft supplies, it is so hard to get craft supplies organized. All of the little pieces always end up tangled in something or lost in the corner. I also really enjoy how most of the home furnishing decor in this room is a hand me down piece, yet they all come together to create a unique space that flows well.
Hi Charlotte – I agree that it is hard to get craft supplies organized. I have a few drawers labeled Stuff, Misc and Other for supplies that didn’t fit into another category. Almost all the furniture in the room is a hand-me down or bought used except the two desk chairs. Painting it all white helps make them all coordinate.
Be still my pink-loving, envious heart!
Hi Carolyn – I have been wanting to paint the armoire pink for some time. I am glad I finally got around to it. It makes such a huge difference and gives the room lots of positive pink energy. :-)
I love your command central studioffice! What a beautiful and functional space…and that view! I used plastic gutters on pegboard for my ribbon holders. I like the simple, streamlined look of yours better. Oh honey….you have to see this :)
Absolutely gorgeous! Who wouldn’t like to work in that space and with a beautiful view to boot! LOVE IT!
Diane, your space is just beautiful – wonderful job and so inspiring. Now I want out of my dark space above the garage.
Hi Gail – The before of the room was pretty dark with yucky rug and dark stained trim. It has taken me a year to make it bright and more to my liking. Looking forward to lunch next week.
I’m obessing over the wrapping paper organizer. Its simply genius!
Beautiful space Diane. I love all of the organization you’ve included and the color palette of the entire room is so pretty and refreshing.
It’s absolutely GORGEOUS!
Can I just move into this room?
It’s gorgeous!
http://aneducationindomestication.com
P.S. Im still holding out hope that I will win the contest you are going to hold where you help redesign a lucky readers space. ;)
Swoon. Is it crazy to want the inside of the pink control center to be hot pink? or a pattern? or another color entirely?
and the pink cow covered object is your sewing machine? it’s too much for it to be a cow right?
I love it your room and your view.
Hi Liz – It is not a crazy idea at all. I may be papering the inside. It used to have paper inside, it was like a Chinese style rice paper from way back when, 1920’s or even earlier. It was coming off when we first got the armoire from my in-laws, who got it from their parents. I found a paper at World Market. If I can get enough rolls I will be using that. The view is my fave part…everything I have always dreamed of having since I was a little kid…a place to call my own.
I could just cry with happiness for you.
You are so sweet Sheryll.. XO
Beautiful! I would love to know how you built your long work station with the filing cabinets. What did you use for the desk top?
Hi Stacey – I am going to be posting all the details of how I built the work station. The desk top is two different pieces. The first one is a laminate desk top that was left in the house with two fie cabinets. They were used in a desk in a closet in one of the bedrooms. I removed it and brought it to use in my studioffice. The other top is a piece of 3/4″ maple plywood I had cut to size at Lowes. There is a slight height difference, about 1/16″. Once I painted both of them they looked the same. I also had to buy the center file cabinet. It is the exact height of the two existing file cabinets and holds the tops in the center.
I love your office Diane!! I’m “this close” to being finished with my office……I wish I had all the room you have – it’s amazing!! every detail!!
Thanks Cheryl – The room was used by previous owners as a dining room. We knew we didn’t need a formal place to dine anymore so I claimed it. It has taken lots of use and thought to get it to the level of organization it has now. Enjoy getting yours finished. I am looking forward to seeing it. :-)
Can I come live with you?
Amazing room! The view is gorgeous and your organizational skills are perfect!
While I’m not a crafter and while I possess some DIY talents, I’m not in your league at all. However, I’m an organization freak so I can definitely appreciate everything you’ve done in your studioffice. I can only imagine trying to box up and move everything in that room, then putting it all back together. Whew! I do wonder how, though, you are able to resist moving a few feet more to work outside on the deck just outside your office door. Not sure I would be so stoic as to remain inside. You do so much and are an inspiration to us all.
Okay, this new and reworked office is even more fantastic than I imagined. Will you please remind me how you made your sewing thread storage? Am I close, in thinking that you drilled holes and used small dowels? Thank you for sharing your brilliant brain with us.
Hi Sheryll – The thread storage are inexpensive wood racks that you can buy at the craft store. I think Walmart even sells them. Mine are very old. The new ones are a light birch wood color.
I’m green with envy! Amazing!!
I simply cannot choose one favorite thing about your office. I thought it was the view of the lake —-until I spied the pink cabinet. Admittedly, I set the laptop aside before I even finished reading the post and went to my little dark, dreary, and unorganized room to see how your ideas could be used. Your space is amazing. I’m now so inspired that something can be done for mine, too. Thanks for sharing. Susie from The Chelsea Project
This is like the studio craft office of my DREAMS! Diane!!! What a magnificent place to be creative. I love it. Are you renting out space in that room? If so, I’ll take it!
Thanks Michael – I would love to rent you some space. Then I could see your brilliant creativity and talent in action!
Two of my very favorite bloggers together! (Good luck with the snow Michael)
I envy your organizing skills. Amazing! The view is awesome as well.
I love your style and I enjoy reading your blog. Entering the Decluttering book give away I would declutter my dining room. At this time my hutch is filled with my craft supplies and the room is very unorganized. After raising six kids and moving alot this can be overwhelming. Thank you.
I love your home office! It’s really fresh! It must be a joy to work in :)
p.s your linky party link isn’t showing up, it’s just code. I made the same mistake with my code! So you’re def not alone
what a bright and pretty space! i LOVE the pink of your armoire- so pretty!!!
What a fresh clean and organized work place.. with a splash of color…..and with a view…love it…thanks for the tips….
oh diane, your studio office is amazing. i love that everything has a place and is so neatly organzied. mine is a pit right now and seeing yours has given me a bit of hope.
i love the fresh look. you are one organized and talented woman thank you for all your inspiration